Send speech commands to your Windows Phone 8 app

In Windows Phone 7.x users can already interact with their phone using the voice. This is done by pressing and holding the Windows key and giving the phone a voice command e.g. “Start [appname]” or “Open [appname]”. In Windows Phone 8 you can extend this and add additional phrases that a user can say which opens up new opportunities allows users to launch to a specific page in an app and launch an app and initiate an action. This post will cover how easy you can implement voice commands in your app. Source code is provided at the end.

Note; this post covers start up commands. Speech recognition within the app will be covered in a later post.

So, we start of with a new Windows Phone 8 project.
The first step is to open the WMAppManifest.xml-file located in the Properties-folder. Switch to the Capabilities-tab. Here we will give the app the necessary capabilities to be able to handle the voice commands. Check the ID_CAP_SPEECH_RECOGNITION-capability.
speech capability

For our demo purpose, before we start with the commands, we add another page to the solution so we have something to navigate to. We can call the page Target.xaml.

Now we are going to add a new item to our project. Select Add->New Item in the context menu for the project and select Voice Command Definition. Lets name it VCDFile.
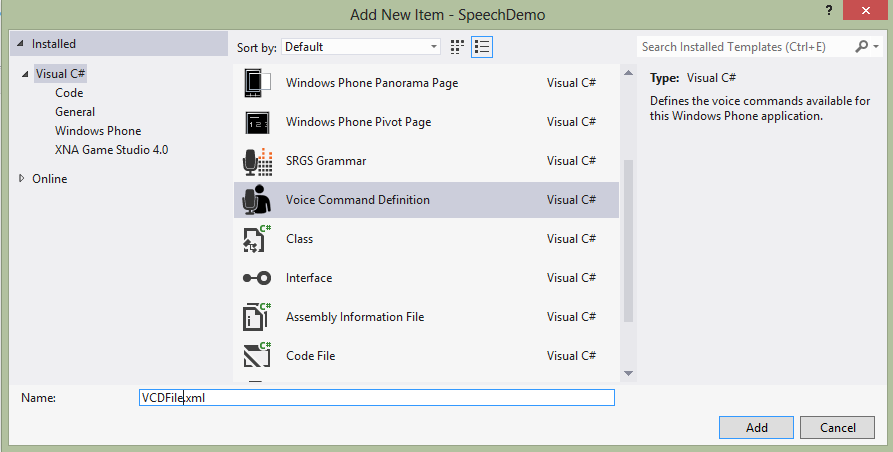
Add VCD file

The VCD-file will give you an example of how to setup your commands. So lets digg into the file and make it our own. Let’s start at the top with the Command Prefix and Example. The value in the prefix tag is what the app will look for as a prefix to the command. So the user will say “SpeechDemo” followed by the commands. The value in the example tag will be displayed by the help for this app as an example of the commands the app supports.

SpeechDemo
 navigate to target

Next we are going to add a command that the app will act upon.
First we will give our command a name. In this case “Navigate”.
Then we will provide an example for this command. “navigate to target”. This will be displayed to the user by the phone as help.
Then we will specify what the phone will actually listen for. “[and] navigating to target”. The square brackets indicates that the word is optional. The reason why we use it this way is because it can give the user a more natural way of speaking. To explain this we will first take a look at two different ways of starting the app;
“SpeechDemo navigate to target” –> Here the “and” would sound weird.
“Start SpeechDemo and navigate to target” –> Without the “and” the user would feel that the command sounded weird.
Then we will provide feedback. This is what the phone will read back to the user and write on the screen.
Navigate is where you can, if you want, specify where the app should navigate when it receives the command. Here we insert our previously added page, “Target”. If you don’t specify a target you will land on your main page where you parse the incomming command and take action in code.
The whole thing wraps up like;

    
       navigate to target 
       [and] navigate to target 
       Navigating to target page... 


If you like, you can also specify options to a command with a “PhraseList”. The phrase list can be extended over time and is can be used for e.g. level selction in a game. To use a phrase list you insert the name of the phrase list in curly brackets. Here is an example we will use later on;

    
       show message one 
       [and] show message {number} 
       Showing message 


       one 
       two 
       three

We are now finished with the VCD-file. Now we need to install the VCD file. The file needs to be installed the first time the app runs. Before the install, no commands will work with the app, since the commands are registered with the speech system on the user’s phone. In this demo we will install the file when the app starts. Go to the code behind for MainPage.xaml and add the following lines;

        public MainPage()
        {
            InitializeComponent();
            SetupVoice();
        }

        public async void SetupVoice()
        {
            await VoiceCommandService.InstallCommandSetsFromFileAsync(new Uri("ms-appx:///VCDFile.xml", UriKind.RelativeOrAbsolute));
        }

This will install the file. Note that the VCD-file can loaded from any URI and not only from the app and that it can be changed by the app when it is running.

Now we can start the app for the for the first time and then begin sending voice commands.
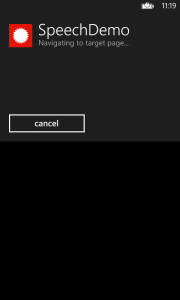
Start the app and then press and hold the Windows key and say; “SpeechDemo navigate to target”. The app will give feedback and then navigate to the target page in the app.
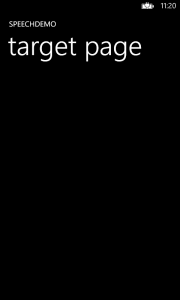
If you wish to inspect the translated query-string for the command this can be done in the “OnNavigatedTo”-method. This is useful when you need to see what phrase that was used or if you wish to have all the commands on one page without navigating away. We are gonna use our command “ShowMessage” from before to show how this can be done. Insert the following code in the MainPage.xaml and try the saying “SpeechDemo show message one”.

        protected override void OnNavigatedTo(NavigationEventArgs e)
        {
            if (e.NavigationMode == System.Windows.Navigation.NavigationMode.New)
            {
                if (NavigationContext.QueryString.ContainsKey("voiceCommandName")) //voice command in querystring
                {
                    var command = NavigationContext.QueryString["voiceCommandName"]; //voice command in querystring
                    switch (command)
                    {
                        case "ShowMessage": //The name of the VCD-command
                                var phrase = NavigationContext.QueryString["number"]; //get the phrase
                                DemoText.Text = string.Format("ShowMessage command {0} activated", phrase);
                            break;
                        default:
                            DemoText.Text = "Couldn't find the command";
                            break;
                    }
                }
            }
        }

Now you have everything you need to create cool apps with voice commands!

Download the source code and have fun! =)

download source code

Use Prism data template selector in Windows Phone app

Quite often you would like to have a Collection in your view model that supports multiple types that derives from the same base type. Along with the different subclasses, you might want different data templates in your view, one for each type. Microsoft Prism can help you do this in an easy way and automatically select correct template for each type. This post will show how to do it on Windows Phone and you can also download the source code for the demo project (Windows Phone 7.1 for compatability) at the bottom of the page.

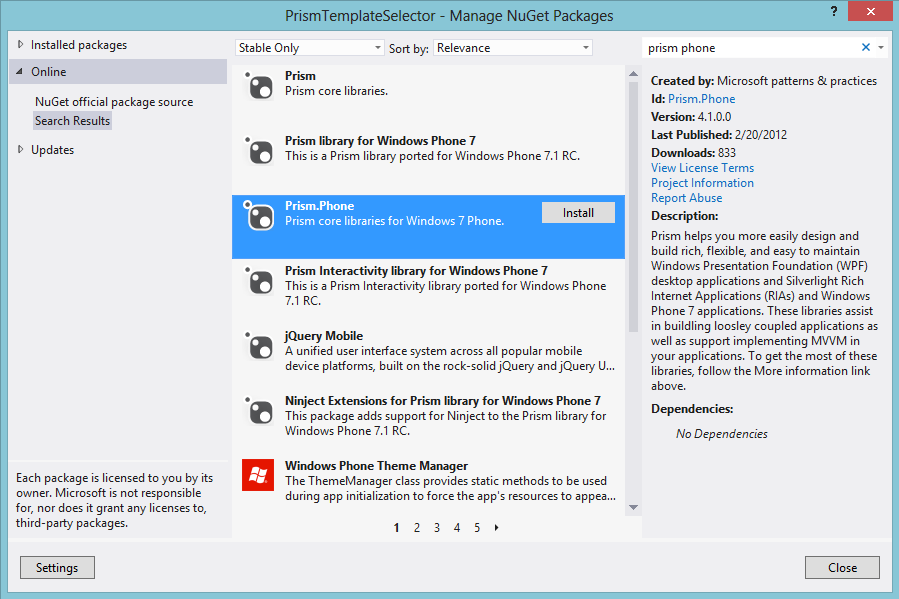
First of all, use Nuget to install Prism Phone to your project.
nuget prism phone

Now, lets play with an example where we want to present a Schedule that contains meetings and trips. This gives us a solution that looks like this.

We edit our simple models so they look like this;

namespace PrismTemplateSelector.Models
{
    public class ScheduleItem
    {
        public DateTime StartDate
        {
            get;
            set;
        }

        public DateTime StopDate
        {
            get;
            set;
        }
    }
}
namespace PrismTemplateSelector.Models
{
    public class Meeting : ScheduleItem
    {
        public string MeetingOrganizer
        { 
            get; 
            set; 
        }
    }
}
namespace PrismTemplateSelector.Models
{
    public class Trip : ScheduleItem
    {
        public string Destination
        {
            get;
            set;
        }
    }
}

Now we will add some code to our view model to add some demo data for our view.

namespace PrismTemplateSelector.ViewModels
{
    public class MainPageViewModel
    {
        public MainPageViewModel()
        {
            Items = new ObservableCollection();
            LoadDemoData();
        }

        public ObservableCollection Items { get; set; }

        private void LoadDemoData()
        {
            Items.Add(new Meeting()
            {
                StartDate = DateTime.Now.AddHours(1),
                StopDate = DateTime.Now.AddHours(4),
                MeetingOrganizer = "Todd Schmidt"
            });
            Items.Add(new Trip()
            {
                StartDate = DateTime.Now.AddDays(4),
                StopDate = DateTime.Now.AddDays(14),
                Destination = "New York"
            });
            Items.Add(new Meeting()
            {
                StartDate = DateTime.Now.AddDays(3),
                StopDate = DateTime.Now.AddDays(3).AddHours(1),
                MeetingOrganizer = "Gilian Pearson"
            });
        }
    }
}

Now when that is all set up, lets look at the magic in our xaml. First of all we will add namespace for Prism into our xaml-view.

xmlns:prism="clr-namespace:Microsoft.Practices.Prism.ViewModel;assembly=Microsoft.Practices.Prism"

After this we will start to write our data template and add them to our resources on the page. Note that the DataTemplate x:key shall be the name of the type you wish to bind to the template.


So finally we will tie Everything together and apply the templateselector to our listbox.


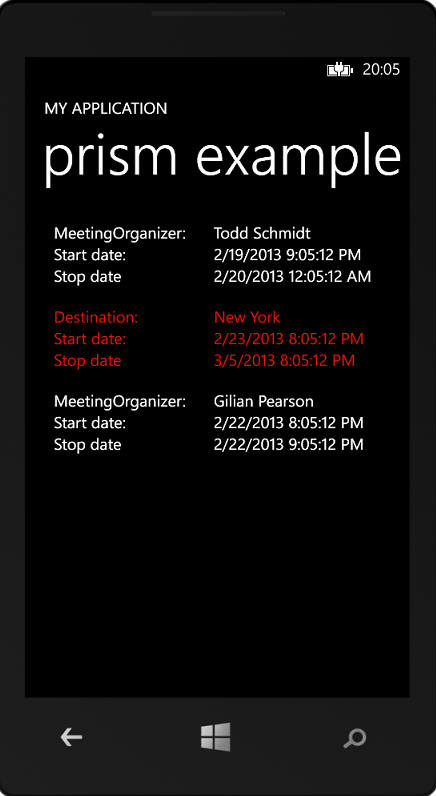
The result will now be;
prism result

download source code

SDK update for Windows Phone 7.8

Microsoft has released an update for the Windows Phone SDK adding two more emulators. This will enable developers to test how their 7.5 apps and tiles will work and look on an 7.8 system. The following is quoted from the Windows blog. Read full article here.

Today we are releasing the Windows Phone SDK Update for Windows Phone 7.8, an optional update that adds two new Windows Phone 7.8 emulator images to your existing SDK installation. These two emulator images should enable you to fully test how your Windows Phone 7.5 app’s Live Tiles will look and behave when they are run on a device running Windows Phone 7.8. New phones with Windows Phone 7.8 are beginning to ship, so it’s a great time to update your apps to take advantage of the new Live Tile experience and to reach the new markets that Windows Phone 7.8 makes available.

Our first app got big attention in local media

Kind of cool, the app we developed for the local news paper NWT got big attention in the local media.

First Sogeti released a press release.

Then NWT posted an article(in swedish) about their app on their web site.

Finally the article also showed up in the paper version of the paper! 🙂

This is an addition to the attention it already got on Microsoft WPC earlier this year! 🙂